
Last Updated on September 6, 2025
When your OBD2 scanner is not connecting to the ECU, it means the diagnostic tool cannot communicate with the car’s computer system. Since the ECU (Electronic Control Unit) is responsible for managing the engine, transmission, and other key components, any failure to connect makes it impossible to read diagnostic trouble codes (DTCs).
There are multiple reasons behind this OBD communication failure. Sometimes the issue is as simple as a weak battery or a blown fuse, while in other cases it could be a compatibility problem between your scanner and the vehicle. Identifying the root cause is crucial before applying fixes.
Common Causes of OBD2 Connection Failure:
- The scanner is not compatible with the vehicle’s OBD2 system.
- The ignition key or ECU boot-up process hasn’t been completed.
- Low battery voltage or poor electrical connections prevent communication.
- A blown fuse in the OBD2/DLC circuit interrupts the power supply.
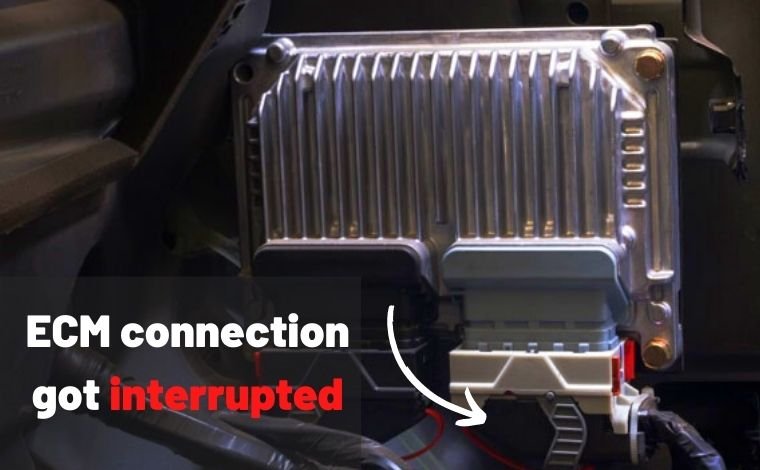
- The ECM/ECU has frozen or experienced an internal malfunction.
- The OBD2 port is dirty, clogged, or damaged.
- Faults in the CAN (Controller Area Network) wiring disrupt signals.
Why this matters:
- Without a proper connection, your scanner can’t read error codes.
- Driving without diagnosing hidden issues could lead to engine damage.
- Understanding the causes helps you fix the problem yourself and avoid unnecessary repair shop visits.
👉 In the following parts, we’ll go step by step through these causes and show you practical solutions to fix OBD2 connection errors.
Compatibility Issues Between OBD2 Scanner and Vehicle
One of the most common reasons an OBD2 scanner won’t connect to the ECU is a compatibility problem. Not all scanners are universal, and not all vehicles support every type of OBD2 communication.
🔎 Vehicle Year and Standard Support
- Pre-1996 vehicles: Cars manufactured before 1996 (in the US) typically don’t support the OBD2 system. Instead, they may use older standards such as OBD1, ALDL, MOBD, or MUTT, which are not compatible with modern scanners.
- Post-1996 vehicles: Most cars built after 1996 in the US (and later in Europe and Asia) must include OBD2 compliance by law. These are usually compatible with standard scanners.
🔎 Protocol Mismatch
Even if your vehicle is OBD2 compliant, the scanner may still fail if it doesn’t support the correct protocol. Different manufacturers use different OBD2 protocols, including:
- ISO 9141-2 – Common in Chrysler, European, and Asian vehicles
- SAE J1850 PWM/VPW – Used by Ford and GM
- ISO 14230 (KWP2000) – Found in many Asian cars
- ISO 15765 (CAN Bus) – Standard for most modern vehicles (2008+)
If your scanner doesn’t recognize your car’s specific protocol, it won’t connect to the ECU.
🔎 How to Check Compatibility
- Look for the OBD2 label: Many vehicles display an “OBD-II Compliant” mark near the engine bay or under the hood.
- Consult your car manual: It specifies which OBD protocol your vehicle uses.
- Check scanner specs: Make sure the tool supports your car’s year, make, model, and communication protocol.
- Use VIN lookup: Some scanners can auto-detect compatibility using the Vehicle Identification Number (VIN).
✅ Fix for Compatibility Issues
- Verify that your car is OBD2 compliant (1996 or newer in the US).
- Ensure your scanner supports multiple protocols, especially CAN Bus, which is widely used in modern cars.
- If your current scanner doesn’t work, try borrowing or buying one that supports your specific manufacturer’s communication system.
Ignition & Power Supply Problems
If your OBD2 scanner is not connecting to the ECU, the problem may not be the tool itself but the ignition cycle or power supply. The scanner needs both the right ignition setting and sufficient voltage to communicate properly.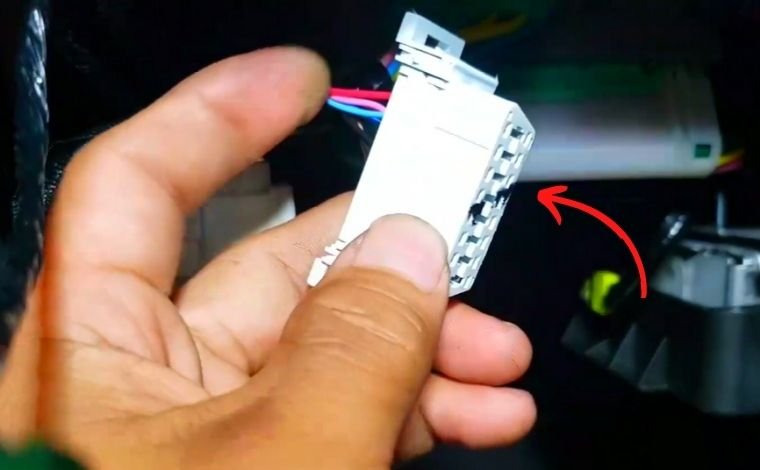
Ignition Key Issues
- The ignition must be in the ON or RUN position for the scanner to connect.
- Some vehicles need extra time for the ECU to boot up. Plugging in the scanner too early may result in a failed connection.
- If the dashboard lights are still flashing or the system hasn’t stabilized, the scanner may not respond.
✅ Fix:
Wait for the vehicle to finish its startup cycle. Once the dashboard indicators settle, reconnect the scanner. This ensures the ECU is ready to communicate.
Low Voltage or Weak Battery
The OBD2 scanner requires at least 12 volts from the car battery to function. If the battery is weak or the OBD2 connector isn’t delivering proper voltage, the tool won’t connect.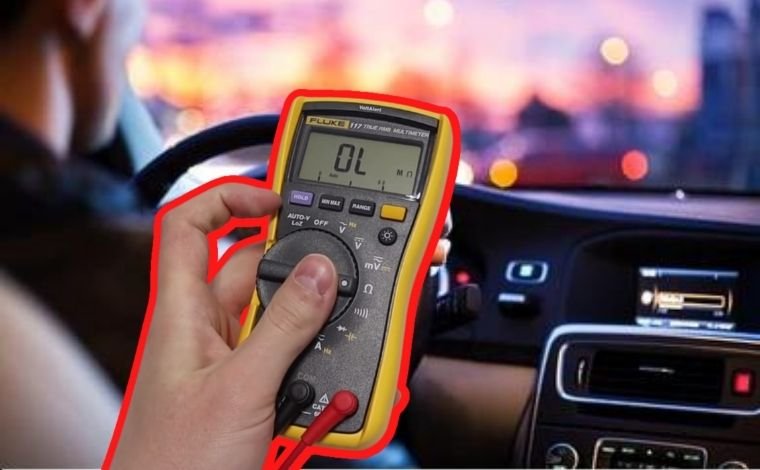
How to test:
- Use a multimeter/voltmeter.
- Connect the red (positive) probe to pin 16 of the OBD2 port.
- Connect the black (negative) probe to pin 4 or pin 5 (grounds).
- A healthy reading should be around 12V.
If there’s no voltage:
- Check for a blown fuse related to the OBD/DLC or cigarette lighter socket.
- Inspect wiring for loose or damaged connections.
- Test the battery itself to ensure it holds charge.
✅ Fix:
- Recharge or replace the car battery if the voltage is too low.
- Replace blown fuses with the correct amperage.
- Repair or tighten wiring connections around the OBD2 port.
Why Ignition & Power Supply Matter
Without proper ignition positioning and voltage supply, the scanner won’t even “wake up” the ECU for communication. These are simple checks you can do before assuming there’s a major problem with the ECU or scanner itself.
Port & CAN Network Problems
Even if your ECU and fuses are fine, a faulty OBD2 port or issues in the CAN (Controller Area Network) wiring can prevent your scanner from connecting.
🚪 OBD2 Port Problems
The OBD2 port (also called DLC – Data Link Connector) is the physical gateway for scanner communication.
Common issues include: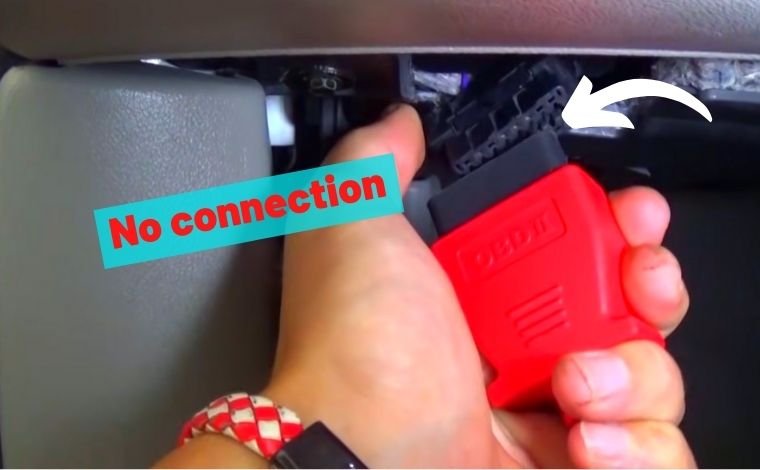
- Dust or debris blocking the pins
- Bent, corroded, or broken pins inside the connector
- Loose connections from frequent plugging/unplugging
✅ Fix:
- Inspect the port visually for dirt or damage.
- Clean it gently with a dry cloth (never use water or spray cleaners).
- Carefully realign bent pins with a small tool.
🔗 CAN Network Faults
The CAN bus system is the vehicle’s communication backbone. If it’s disrupted, the scanner won’t receive data from the ECU.
Possible causes:
- Damaged wiring in the CAN bus
- Short circuits or open circuits in pins 6 (CAN High) and 14 (CAN Low)
- Faulty control modules interfering with network signals
✅ Fix:
- Perform a pin drag test on pins 6 and 14 to check for proper resistance.
- Inspect CAN wiring for visible wear, cuts, or corrosion.
- If wiring and connectors are intact, a professional diagnosis may be required.
Why This Matters
- A dirty or clogged port prevents the scanner from even making physical contact.
- A faulty CAN bus disrupts communication across all modules (ECM, ABS, TCM, etc.).
How to Check the OBD2 Socket
The OBD2 socket, also known as the DLC (Data Link Connector), is the central hub that connects your scanner to the vehicle’s ECU. Since the port has 16 pins, each serving a specific function, even a single damaged or loose pin can cause OBD communication failure. Learning how to inspect and test the socket will save you time and help you pinpoint the real issue.
🔍 Step-by-Step Guide to Checking the OBD2 Socket (DLC)
Your OBD2 socket (DLC – Data Link Connector) has 16 pins, each with a specific role in powering the scanner and communicating with the ECU. If your OBD2 scanner won’t connect, testing the socket is an essential troubleshooting step.
🛠️ Tools You’ll Need
- Multimeter/voltmeter
- Small flashlight
- Needle probe or pin tool (for testing pin tightness)
- Fuse puller (optional)
- Car owner’s manual (for fuse box reference)
Step 1: Perform a Visual Inspection
- Locate the OBD2 port (usually under the dashboard, driver’s side).
- Use a flashlight to check inside.
- Look for bent, broken, corroded, or missing pins.
- Check for dust or debris blocking the socket.
👉 If dirty, clean gently with a dry cloth or compressed air. Never use water or cleaning spray.
Step 2: Test Power Supply (Pin 16)
- Set your multimeter to DC voltage.
- Connect the red probe to pin 16 (top-right corner, provides +12V).
- Connect the black probe to pin 4 or pin 5 (grounds).
- Reading should be around 12V (with ignition ON).
👉 If no voltage is detected: check the DLC fuse or car battery condition.
Step 3: Test the Ground Pins (Pins 4 & 5)
- Keep the multimeter set to voltage.
- Connect the red probe to the car battery’s positive terminal.
- Touch the black probe to pin 4 and then pin 5.
- You should get a 12V reading each time.
👉 If no reading is shown, the ground wiring is faulty and must be repaired.
Step 4: Check CAN Communication Pins (Pins 6 & 14)
- Switch multimeter to resistance (ohms) mode.
- Place probes on pin 6 (CAN High) and pin 14 (CAN Low).
- A healthy reading should be about 60 ohms.
👉 If resistance is far higher or lower, the CAN bus may have a short, open circuit, or faulty wiring.
Step 5: Perform a Pin Drag Test
- Insert a thin needle probe or terminal tool into each pin.
- Gently move the probe to feel for tightness and grip.
- Loose pins won’t make proper contact with the scanner.
- If loose, carefully bend the pins inward for better contact.
Step 6: Reconnect the Scanner
- After checking voltage, grounds, and CAN communication, reconnect your scanner.
- If communication is restored, the socket was the problem.
- If not, the issue may lie in the ECU or CAN wiring deeper in the system.
FAQs – OBD2 Scanner Not Connecting to ECU
Q1. Why is my OBD2 scanner not connecting to the ECU?
The most common reasons include scanner incompatibility, ignition not set to ON/RUN, low battery voltage, blown fuses, dirty OBD2 ports, or CAN network faults.
Q2. My OBD2 scanner powers on but shows “No Connection.” What does that mean?
This means the scanner is receiving power but cannot communicate with the ECU. Causes may include protocol mismatch, faulty wiring, ECU glitches, or invalid PID data.
Q3. How do I know if my car is OBD2 compatible?
Cars manufactured after 1996 in the U.S. (2001 for petrol and 2004 for diesel in the EU) are usually OBD2 compliant. Look for an “OBD-II Compliant” label under the hood or check your vehicle manual.
Q4. What voltage should I get from my OBD2 port?
Pin 16 of the OBD2 port should provide around 12 volts. If you don’t see this reading, check for blown fuses or weak battery issues.
Q5. Can a blown fuse stop the OBD2 scanner from working?
Yes. The OBD2/DLC fuse powers the port. If it blows, the scanner won’t turn on or connect to the ECU. Replacing the fuse usually fixes the issue.
Q6. Can dust or dirt in the OBD2 port cause connection failure?
Absolutely. Dust, debris, or bent pins can block signals between the scanner and ECU. Always keep the port clean and free of obstructions.
Q7. How do I reset the ECU if it’s not responding?
Disconnect the battery terminals, press the brake pedal for 30 seconds to drain power, wait 10–15 minutes, and then reconnect the battery. This resets the ECU and often restores scanner communication.
Q8. What should I do if none of these fixes work?
If you’ve checked compatibility, fuses, voltage, port cleanliness, and still face issues, the problem may lie in the CAN network wiring or a deeper ECU fault. At this point, professional diagnostic support is recommended.