
Last Updated on April 28, 2026
Has the check engine light on your vehicle turned on? You don’t have to panic or visit a mechanic. With a quality diagnostic scan tool, you can check why the check engine light is turned on instantly.
The check engine light (CEL) can be very intimidating to motorists as it’s a sign of a car problem. However, it’s also a warning sign that your car has an issue that has to be rectified. So, it warns you of impending danger and gives you peace of mind when you handle the problem. If you’ve never used an OBD2 scan tool before and are wondering how this small gadget is utilized, you’re in the right place.
When it comes to the vehicle’s check engine light (CEL), there are two terms that you should be aware of. These are DTC and OBD. Diagnostic trouble codes (DTC) are the automotive computer codes kept by the Onboard diagnostic system (OBD) in your vehicle. OBD and DTC refer to almost the same thing. OBD codes are typically referred to as OBD2, which has been in use since 1996.
Difference between OBD and DTC
So what is an OBD scanning system? OBD is a built-in system that monitors all of the diagnostics in the vehicle. It monitors the various systems in the car that affect the ABS light, Airbag light, or other lights, with the most common light being the check engine light.
On the contrary, the DTC is the code that the OBD scan tool reveals to show an issue with your car. The code is usually made up of 5 letters and numbers, such as P0300, pinpointing the problem.
What does the check engine light turning on mean?
When a check engine light turns, it’s a sign that your vehicle has a problem. And since there are several possible OBD codes, there are also hundreds of possible reasons for the light turning on it. Some of these include:
- Emissions control problems
- Computer output circuit issues
- Ignition system faults
- Transmission problems
- Fuel and air metering systems problems
- Speed control and idle problems
When the check engine light is turned on and flashes, it’s a sign of a severe problem that has to be handled right away. But if it doesn’t flash, it’s an indication of a minor issue.
Related article: Easy way to clear OBD2 codes without a scanner
Besides, you may notice different types of lights on your scanner – green, red, and yellow. When your scanner shows green, it means that all engine systems are okay and running well. If it shows yellow, this is a sign that there is a pending code present or monitor status. But if the light is red, this means there is a problem with the vehicle’s system that has to be handled.
How to check engine light with an automotive diagnostic scanner
If the check engine light illuminates your car’s dashboard, you need to find out what’s the problem. Using a diagnostic scanner, you can pinpoint the problem within a short time. Here is the procedure:
Step 1: Locate your car’s OBD port
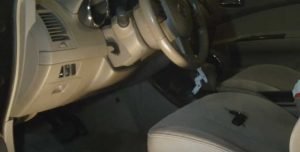
Most vehicles have the OBD port located under the dashboard and close to the pedals. Besides, it’s a requirement for the OBD port to be within 3 feet of the steering wheel and shouldn’t need tools to access it. The port usually comes with 16-pins. So check the OBD2 port if it is not working.
Step 2: Plug your OBD scanner into the connector

Insert the end of the scan tool cable into the connector. This end will easily fit into the OBD port, and the scanner will be turned on immediately after you turn on the car.
Step 3: Read the codes on the computer
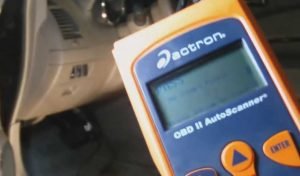
Note that different scanners operate differently. It will depend on whether it’s an OBD2 scan tool, Bluetooth OBD II scanners like OBDLink MX, or a Wi-Fi OBD2 diagnostic scanner like OTC. Follow the step-by-step instructions in the user manual to operate the scan tool correctly. Next, navigate the heading referred to as “Read Codes” and choose it.
Step 4: Record the codes that display

If the codes are many, the scanner may cycle through, or you may have to press a button to access the following codes. Ensure to write down these codes in the same order that they appear on the scanner.
Step 5: Interpret OBD2 codes
This is among the most challenging parts, especially if your scanner doesn’t give detailed information about the codes. But if you know how to read the codes, this shouldn’t be a challenge at all.
How to interpret OBD2 codes
- Break down your codes into parts
- The first part is the first character, which is typically a letter
- The second part is the next character, which is usually a single number, from 0 to 3
- The third part is the third character, which is usually a single number from 0 to 9
- The final part features both the fourth and fifth characters; hence it’s a pair of numbers, from 00 to 99.
- Determine the meaning of the letter
There are usually four pairs of numbers that can be shown in the first part. This includes P0XXX – Generic, P1XXX – Manufacturer-specific, P2XXX – Generic, P30XX-P33XX – Manufacturer-specific, and P34XX-P39XX – Generic.
The letter “P” in this part shows powertrain-related codes. These are usually linked with the engine or transmission and their sensors.
Apart from codes that start with “P,” there are also other codes that begin with B, C, and U. Codes with “B” stand for body codes such as airbags, “C” stands for Chassis codes such as anti-lock brakes, and “U” stands for network codes such as module failures.
N/B: Before buying a diagnostic scan tool, it’s crucial to understand that only professional-grade scanners or dealership san tools can diagnose error codes out of powertrain codes.
-
Determine whether the codes are manufacturer-specific or society of Automotive Engineers
The first number in the sequence typically shows this immediately after the letter.
Note that SAE codes are generic codes that apply to all vehicle makes and models. They are shown by the number “0” as the second digit. While manufacturer-specific codes use any number besides “0”. P0 shows it’s a generic or SAE code, while P1 shows that it’s a manufacturer-specific code.
-
Identify which system the code belongs to
The third number in the sequence refers to the system affected. Here are some of the references:
- A “1” shows a fuel or air metering issue
- A “2” pinpoints fuel or air metering injection system issue
- A “3” shows an ignition-related issue
- A “4” pinpoints emissions system challenge
- A “5” shows the idle control system and vehicle speed controls
- A “6” pinpoints computer output circuit problems
- A “7,8 &9” indicates transmission-related issues
- Identify the precise fault
Related Topics: How you can read OBD2 freeze frame data?
The last two numbers in the sequence describe the error code. To read the description of your particular error code, you may have to check its man online.
Summary
With this detailed guide on how to check engine light with a scanner, you can pinpoint why the check engine light is one and have peace of mind. Always use an advanced scanner if you want to find accurate and precise outcomes.