
Last Updated on November 12, 2026
Have you ever been driving and suddenly noticed the check engine light on your dashboard? If you’ve already diagnosed and fixed the problem, knowing how to clear OBD2 codes can help you check the repair. Start by saving the codes and the conditions when they set. A permanent code follows a different process: the vehicle removes it after it verifies the repair under the required conditions.
What Are OBD2 Codes?
OBD2 stands for On-Board Diagnostics II. Most U.S. passenger cars and light trucks have standard OBD2 from model year 1996 onward. The system monitors emissions-related functions and records a diagnostic trouble code (DTC) when it detects a qualifying fault. Some faults turn on the check engine light. Others appear as pending codes before they meet the criteria for confirmation.
Types of Codes
- P codes: Powertrain, including engine and transmission faults.
- B codes: Body systems, which can include airbag or climate control faults.
- C codes: Chassis systems, such as brakes or steering.
- U codes: Network or module communication faults.
A code such as P0300 points to a detected random or multiple-cylinder misfire. Read the whole code and the module that reported it. A generic OBD2 scan focuses on emissions-related data. Accessing every ABS, airbag or transmission fault requires the appropriate coverage for that vehicle.
Why You Might Want to Clear OBD2 Codes
After saving the diagnostic information and completing a repair, clearing resettable codes can give you a clean starting point for a follow-up scan. Some vehicle service procedures specify when to erase codes after a repair. If the repair has already been made, some vehicles can also turn the light off automatically when the relevant monitor passes on qualifying trips.
If you are still diagnosing the car, keep the original evidence. The code, its status and its freeze frame may be the only record of an intermittent fault. An immediate scan with no returning code only tells you what the computer has reported so far. The monitor may need the right temperature, speed or load to run again.
How to Clear OBD2 Codes Without a Scanner
After a repair, let the vehicle run the appropriate self-test if the service procedure allows it. Turning the ignition on and off a set number of times or disconnecting the battery is an unreliable way to clear codes. A 12-volt battery disconnect may reset diagnostic data, readiness or learned settings on some vehicles, while other information can survive the loss of power.
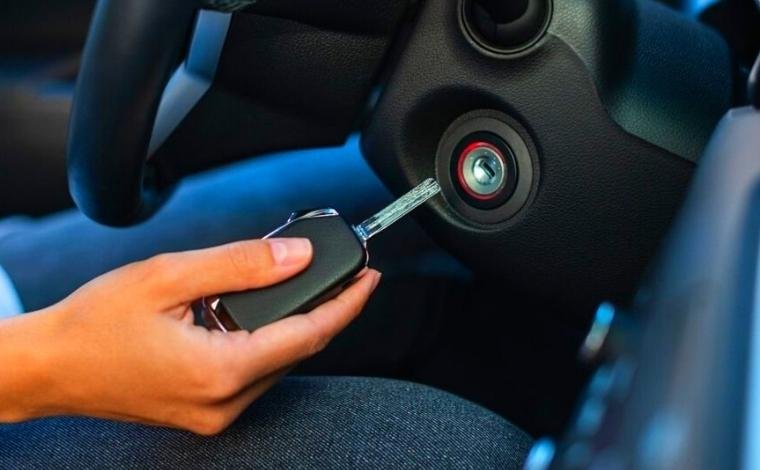
If the vehicle maker specifies a battery disconnect for a repair, follow its exact procedure. Leave the battery connected if your only goal is to erase a check engine code. The ignition switch shown below illustrates the control used to select ignition ON for a scan. The right key or start-button sequence depends on your car.
How to Clear OBD2 Codes With a Scanner
Use the erase function when the service procedure calls for it and you’ve recorded the diagnostic information. The menu names vary, but the order is similar across many tools.
Step 1: Check Compatibility
Confirm that the reader supports generic OBD2 for your vehicle and can read and erase engine codes. If you are working on a different module, check whether the specific tool can reach that system and perform the erase function on your year, make and model. Access to a module for reading and access for clearing can differ.
Step 2: Locate and Connect
Find the diagnostic connector, usually near the driver’s side of the dashboard. With the vehicle parked, connect the tool in the order specified by its instructions. Many tools call for ignition ON with the engine off for code erasure. For a push-button car, follow the owner’s manual to enter the right mode.
Step 3: Scan for Codes
Select the correct system. Record the full code, module and whether each entry is pending, confirmed or permanent where supported. Save the freeze frame associated with the code before clearing. If you have a scan report, keep the VIN or vehicle details, date and mileage so you can recognize which scan it came from later.
Step 4: Clear the Codes
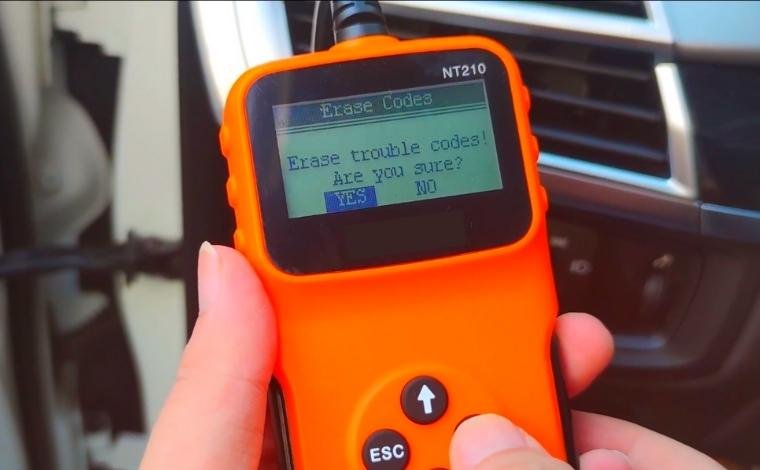
Select Erase Codes or Clear DTCs for the intended system and confirm the prompt. Keep the ignition in the state requested by the tool during the procedure. After the tool confirms, read codes again. Then, if the vehicle is safe to drive, follow the service procedure so the relevant monitor has a chance to check the repair. Scan again after it runs.
Other Reset Methods and Mobile Apps
1. Pulling an ECU Fuse
Some service procedures call for isolating an ECU power feed for a specific repair. Follow those instructions for the exact vehicle. Pulling an ECU fuse as a generic code reset can interrupt power to other systems and erase useful diagnostic or learned information. It cannot erase a permanent emissions DTC through a power loss.
2. Mobile Apps with Bluetooth Adapters
A compatible adapter and app can send the same type of erase request as a handheld reader. Check that the app supports your phone and exact adapter, and confirm it can erase the code category or module you’re working on. Save the report before using the in-app Clear Codes command.
What Happens After You Clear OBD2 Codes?
1. Readiness Monitors Reset
After a generic emissions-code erase, supported readiness monitors may report incomplete until the vehicle runs its self-tests again. Check what conditions the readiness monitors need and the rules for your local emissions inspection before taking the vehicle for a test.
2. Relearning Phase
A generic erase request clears resettable diagnostic information. A battery disconnect or a separate adaptation reset can affect other learned settings. The effects vary by vehicle and by the command used. Follow the manufacturer’s relearn instructions if the repair procedure requires them.
3. Masked Problems
If the underlying fault is still present, the vehicle may detect it again as soon as the relevant test runs. A light that stays off for a short drive is an incomplete check when the monitor is still waiting for its required conditions. If the check engine light flashes while driving, follow your vehicle’s warning instructions.
4. Permanent Codes Can Remain
If the scanner shows a permanent DTC, the vehicle keeps it until it verifies the fault is gone according to its monitor rules. You can see a permanent code even when the light is off and the original confirmed entry has cleared. If that entry stays after a repair, check why a permanent code can remain before using the erase command again.
Best Practices Before Clearing Codes
- Save the codes, statuses and freeze frame. Take a photo of the scan screen if the tool cannot export a report.
- Test the system named by the code and complete the repair before using an erase command to verify it.
- When you rescan, check code status, the commanded warning light and whether the relevant monitor ran.
FAQs – How to Clear OBD2 Codes
Q1. Will the check engine light go off if the problem is fixed?
It can go off once the vehicle verifies the repair. How soon depends on the monitor and the driving conditions it needs.
Q2. Can I clear codes just by removing the battery?
Some resettable information may be lost. A permanent code stays until the vehicle meets its clearing criteria. Save the data and use the specified procedure for your repair.
Q3. What happens if I clear a code but the issue is still present?
The same code can return as pending or confirmed after the relevant test runs. If it returns, record the new freeze frame and compare it with the original.
Q4. What if I’m clearing codes before selling the car?
Keep the scan and repair records and disclose known faults. The new owner can use those records to understand what was fixed and whether any monitor is still incomplete.
Q5. Can clearing codes fix the car?
Clearing changes the diagnostic record. A repair corrects the fault, and a follow-up scan and monitor check help verify the result.
Conclusion
Knowing how to clear OBD2 codes is useful when you have a record of the fault and a repair to check. Save the scan first, erase only the intended records, and check whether the vehicle completes the monitor after the repair.