
Last Updated on June 4, 2025
If you regularly drive a car, you’ve likely encountered the check engine light on your dashboard. This small yet important warning light is a key part of your vehicle’s onboard diagnostic system. It alerts you to potential issues with your engine or other systems, helping you take action before small problems turn into costly repairs.
In this comprehensive guide, you’ll learn how to reset the check engine light using different methods. Whether you’re a beginner or a seasoned DIYer, this article will help you understand the reasons behind the warning and how to deal with it properly.
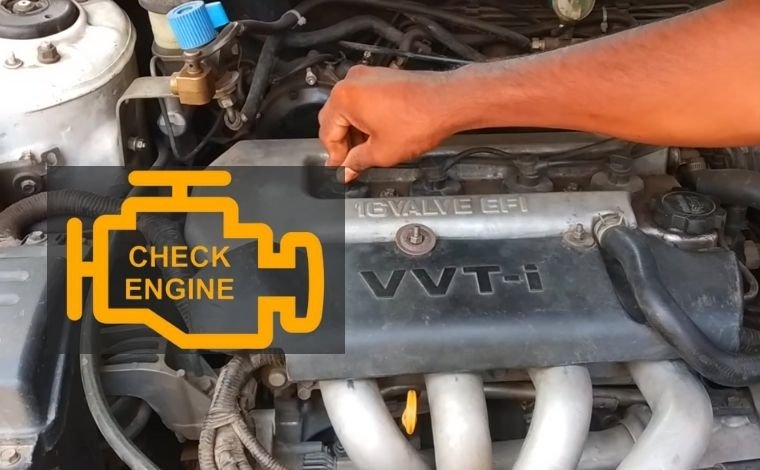
What Is the Check Engine Light?
The check engine light (CEL), often displayed as a small engine-shaped icon or with the words “Check Engine,” is one of the most critical warning indicators on your vehicle’s dashboard. It’s part of your car’s Onboard Diagnostics (OBD-II) system, which monitors the performance of various vehicle components and ensures they meet emission and operational standards.
When the CEL turns on, it signals that your car’s engine or emission system has encountered a problem. These problems can range from simple issues, like a loose gas cap, to serious concerns such as engine misfires, transmission failures, or catalytic converter malfunctions. The light is your vehicle’s way of telling you that something needs your attention, even if the vehicle appears to be driving normally.
Understanding this warning and responding promptly can prevent further damage and costly repairs. That’s why learning how to reset the check engine light—only after diagnosing and resolving the root issue—is essential for every car owner.
Why Does the Check Engine Light Turn On?
There are many reasons the check engine light might illuminate, and it doesn’t always mean your vehicle is in immediate danger. The light is triggered when the car’s onboard computer (ECU or ECM) detects something out of the ordinary within one of the monitored systems. The severity of the issue determines whether the light is steady or blinking.
Common Reasons for the Check Engine Light to Turn On:
-
Loose or Damaged Gas Cap: This is the most common reason and the easiest to fix.
-
Faulty Oxygen (O2) Sensor: It affects fuel efficiency and emissions.
-
Failing Catalytic Converter: Reduces harmful emissions; damage can be expensive to repair.
-
Mass Air Flow Sensor Issues: Affects air intake and fuel mixture.
-
Faulty Spark Plugs or Ignition Coils: Can lead to engine misfires.
-
Bad Fuel Injectors: Interrupts fuel delivery, impacting engine performance.
-
Vacuum Leaks: These can alter engine RPM and idle quality.
-
Worn Battery or Charging Problems: Electrical issues may also trigger the CEL.
In modern vehicles, emission control is tightly regulated, and even small anomalies—like a slight variation in air-fuel ratio—can trigger a warning. While the light may sometimes result from a temporary glitch, ignoring it can result in bigger problems and failed emissions tests.
How the Check Engine Light Works
Understanding how the check engine light functions helps you take better care of your vehicle and avoid unnecessary repairs. At the heart of this system is the Electronic Control Unit (ECU), which constantly receives input from multiple sensors located throughout the vehicle.
These sensors track vital parameters such as:
-
Engine speed (RPM)
-
Throttle position
-
Oxygen levels in the exhaust
-
Coolant temperature
-
Fuel pressure
-
Air intake levels
-
Emission levels
When any sensor detects an irregular reading that falls outside pre-programmed parameters, it sends a signal to the ECU. If the issue persists for a certain number of cycles (usually 2–3), the ECU stores a diagnostic trouble code (DTC) and activates the check engine light on the dashboard.
There are two main types of check engine light behavior:
-
Steady Light: Indicates a less critical issue, such as a sensor needing calibration or a minor emissions fault.
-
Flashing Light: Signifies a severe problem—such as an engine misfire—that could damage your catalytic converter or other vital components.
When the light flashes, it’s important to pull over safely and seek professional help immediately. Continued driving may lead to expensive repairs and potentially hazardous conditions.
Diagnosing the Problem Before Resetting
Before you think about resetting the check engine light, it’s critical to diagnose the actual problem. Resetting the light without solving the issue is like covering a smoke alarm—it may silence the noise, but it doesn’t stop the fire.
The most efficient way to diagnose the issue is by using an OBD2 scanner, a compact device that plugs into your car’s OBD-II port (usually located under the dashboard near the driver’s seat). These scanners retrieve stored trouble codes from the ECU.
How to Diagnose the Problem:
-
Connect the OBD2 Scanner to the port with the ignition in the “On” position.
-
Scan for Trouble Codes: Let the scanner retrieve stored codes. These are alphanumeric, such as P0171 (lean fuel mixture) or P0301 (misfire in cylinder 1).
-
Interpret the Codes: Use the scanner’s manual or a code lookup tool online to understand what each code means.
-
Inspect the Affected System: Depending on the code, check relevant components—e.g., gas cap, spark plugs, O2 sensor, etc.
-
Repair or Replace Parts: If you’re confident and experienced, you can perform the repairs yourself. Otherwise, consult a mechanic.
Once the problem is diagnosed and resolved, only then should you proceed to reset the check engine light. If you reset it too soon without fixing the root cause, the light will likely turn back on—and you might even worsen the condition.
How to Reset Check Engine Light: 6 Proven Methods
Once you’ve diagnosed the issue and fixed the problem, you can use one of the following methods to reset the check engine light:
1. Use an OBD2 Scanner (Recommended Method)
Using an OBD2 scanner is the most accurate and effective method to reset the check engine light.

Steps:
- Locate the OBD2 port under your dashboard.
- Plug in your OBD2 scanner.
- Turn on the ignition (don’t start the engine).
- Allow the scanner to connect to your car’s computer.
- Select the “Read Codes” option and write down the trouble codes.
- Fix the underlying issue if not done already.
- Choose the “Erase Codes” or “Clear DTCs” option.
- Turn off the ignition, wait a moment, and then restart your car.
If the issue is fixed, the check engine light should be off. If the light remains, further diagnosis is needed.
2. Drive the Car Normally
If the problem was temporary and has already been resolved, the check engine light may turn off automatically after a few drive cycles.
A drive cycle involves starting the engine, reaching optimal operating temperature, and driving at different speeds and conditions. In most cars, it may take 10–20 miles or a few cycles for the system to reset.
This method is only suitable when you’re confident the issue has already been resolved.
3. Disconnect the Car Battery
This method can clear stored codes and reset the ECU (Engine Control Unit), but it’s not always recommended as it may also erase other system settings.
Steps:
- Turn off your car.
- Disconnect the negative battery terminal using a wrench.
- Wait for 15 minutes.
- Press the horn or turn on headlights to drain residual power.
- Reconnect the battery terminal.
- Start your vehicle and check if the light is off.
If the check engine light remains, the issue likely still exists.
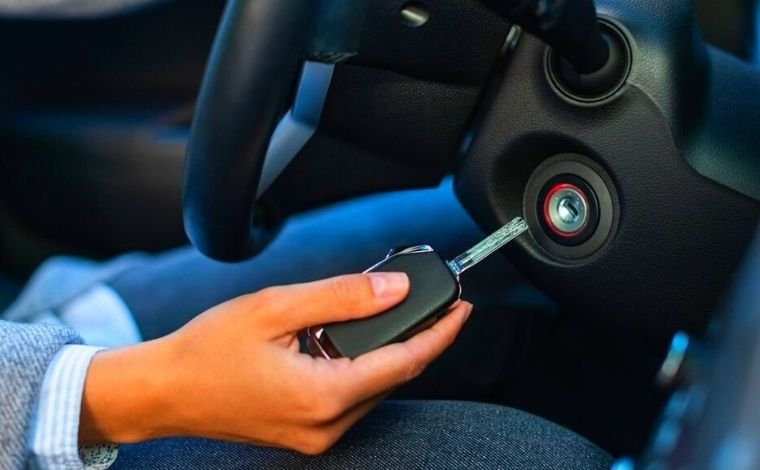
4. Use the Ignition Key Cycling Method
Some older vehicles allow resetting the warning light by cycling the ignition key.
Steps:
- Insert the key into the ignition.
- Turn it to the “On” position (without starting the engine).
- Wait for 1 second, then turn it off.
- Repeat this 3–5 times.
- Start the car and check if the light has cleared.
Note: This method may not work for modern vehicles with push-start systems.
5. Remove and Reinsert the ECU Fuse
In some cases, pulling out and reinserting the ECU fuse (Engine Control Unit fuse) can reset the check engine light.
Steps:
- Locate your car’s fuse box (refer to the owner’s manual).
- Find the fuse labeled ECU, ECM, or PCM.
- Use a fuse puller or pliers to remove the fuse.
- Wait for 10–15 minutes.
- Reinsert the fuse securely and start your car.
This method works better in older vehicles and may not be effective for newer models.
6. Restart the Car
Sometimes, a simple car restart can reset temporary warnings.
Steps:
- Turn the engine on.
- Let it run for a few minutes.
- Turn it off and wait a few seconds.
- Repeat the process 2–3 times.
In some cases, this might reset minor sensor errors or software glitches.
What If the Check Engine Light Turns Back On?
If your check engine light turns on again after being reset, it means the problem still exists. Reconnect your OBD2 scanner to identify the code and recheck your repair. If you’re unsure, it’s best to consult a professional mechanic.
Can the Check Engine Light Turn Off by Itself?
Yes, the check engine light may turn off on its own if the car’s computer no longer detects the issue during its monitoring cycles. However, if the light stays on for several days, you should investigate further.
Tips to Prevent the Check Engine Light from Coming On Again
- Always tighten the gas cap properly
- Use high-quality fuel and engine oil
- Maintain your car’s service schedule
- Check sensors and emission components regularly
- Inspect spark plugs and ignition coils
Final Thoughts on Resetting the Check Engine Light
Resetting the check engine light is relatively easy, but understanding why it turned on is even more important. Ignoring the light or resetting it without fixing the underlying issue can lead to costly damage.
Using an OBD2 scanner is the most reliable method to reset the light and diagnose the problem accurately. However, other manual methods like battery disconnection or fuse removal can work as temporary solutions.
If the light persists, don’t take chances—consult a certified mechanic to ensure your vehicle runs safely and efficiently.
FAQs
1. Can I reset the check engine light without a scanner?
Yes, you can use methods like disconnecting the battery, turning the ignition key on/off, or removing the ECU fuse. However, these are less reliable than using an OBD2 scanner.
2. How long does it take for the check engine light to reset after fixing the issue?
In most cases, it takes 10–20 miles of normal driving or a few drive cycles for the light to turn off automatically.
3. Will resetting the check engine light erase diagnostic codes?
Yes, when you reset the light using a scanner or other method, it clears the stored diagnostic trouble codes (DTCs) from the system memory.
4. Is it safe to drive with the check engine light on?
If the light is steady, it may be safe for short drives, but if it’s blinking, stop driving immediately and have the car inspected. Blinking lights often signal severe engine problems.
5. Can a low battery cause the check engine light to come on?
Yes, a weak or dying battery can trigger fault codes, causing the check engine light to turn on. Always check your battery’s health if you’re unsure.