
Last Updated on October 8, 2026
If you’re wondering what is Mode 6 on a scan tool, you’re not alone. Many car owners use OBD2 scanners to read trouble codes, clear the Check Engine Light, or monitor live engine data. But there’s another diagnostic feature that often gets overlooked.
It’s called Mode 6, and it can reveal information that ordinary trouble codes don’t always show.
Mode 6 lets you view the results of certain tests your car’s computer performs on emissions-related systems. These results can help you investigate intermittent problems, check whether a monitored system passed its test, and sometimes spot unusual readings before a confirmed trouble code appears.
However, understanding the numbers takes some care. A failed test doesn’t automatically identify a bad part, and a result close to its limit doesn’t mean something is about to fail.
In this guide, I’ll explain how Mode 6 works, how to read its results, and when it’s worth using during vehicle diagnostics.
What Is Mode 6 on a Scan Tool?
Mode 6, also called Mode $06 or Service $06, is a standardized OBD2 function that retrieves results from onboard monitoring tests.
Your car’s computer runs these tests to check certain emissions-related systems. Depending on the vehicle, Mode 6 may provide results for:
- Catalytic converter efficiency
- Oxygen sensor performance
- Oxygen sensor heater operation
- Evaporative emissions (EVAP) systems
- Exhaust gas recirculation (EGR)
- Variable valve timing (VVT)
- Engine misfire monitoring
The available tests depend on the vehicle’s diagnostic system and the scanner you’re using.
Unlike live data, Mode 6 generally displays the results of tests the computer has already completed.
Think of it as a report card for your car’s onboard self-tests.
Why Is Mode 6 Important for DIY Car Diagnostics?
Most drivers don’t investigate a problem until the Check Engine Light comes on.
But sometimes a vehicle develops an intermittent problem before its computer stores a confirmed diagnostic trouble code.
Mode 6 may provide useful information during this stage.
For example, a monitor might complete a test and record a result close to its programmed limit. That reading could give you a reason to investigate further, especially if you’re already noticing symptoms.
However, the reading isn’t a prediction of when a component will fail.
The biggest advantage of Mode 6 is that it provides additional evidence. Instead of relying only on a trouble code, you can compare onboard test results with live data, vehicle symptoms, and other diagnostic findings.
Example: Using Mode 6 to Investigate an Intermittent Misfire
Imagine you’re driving an older Honda Accord that occasionally idles roughly, but the Check Engine Light hasn’t come on.
You check for stored trouble codes and find nothing that clearly explains the problem.
On a vehicle that supports cylinder-specific Mode 6 misfire data, you may be able to review the results of the computer’s misfire monitoring tests.
Suppose one cylinder shows noticeably different results from the others.
That doesn’t prove the spark plug or ignition coil has failed. But it gives you a useful place to begin checking.
You could inspect the ignition components, compare cylinder operation, and perform appropriate tests for fuel delivery, compression, or air leaks.
If testing points toward an ignition coil, swapping compatible coils between cylinders may help confirm whether the problem follows the coil.
That’s where Mode 6 becomes useful. It can help narrow the investigation without encouraging you to replace random parts.
How Mode 6 Data Is Displayed
Depending on your scanner, Mode 6 data may appear as a list of readable test descriptions or unfamiliar hexadecimal numbers.
A simplified example might look like this:
| Field | Example |
|---|---|
| Test | Example emissions monitor |
| Measured Value | 85 |
| Minimum Limit | 0 |
| Maximum Limit | 100 |
| Result | Pass |
These are illustrative numbers, not actual vehicle test values.
The measured result falls within the example’s acceptable range. However, you cannot use that number to predict how soon a component might fail.
Some tests have only a maximum limit, others have a minimum, and some use both.
To interpret an actual reading, you need the correct test description, units, scaling, and limits for your vehicle.
Understanding Mode 6 Test IDs, CIDs, and Values
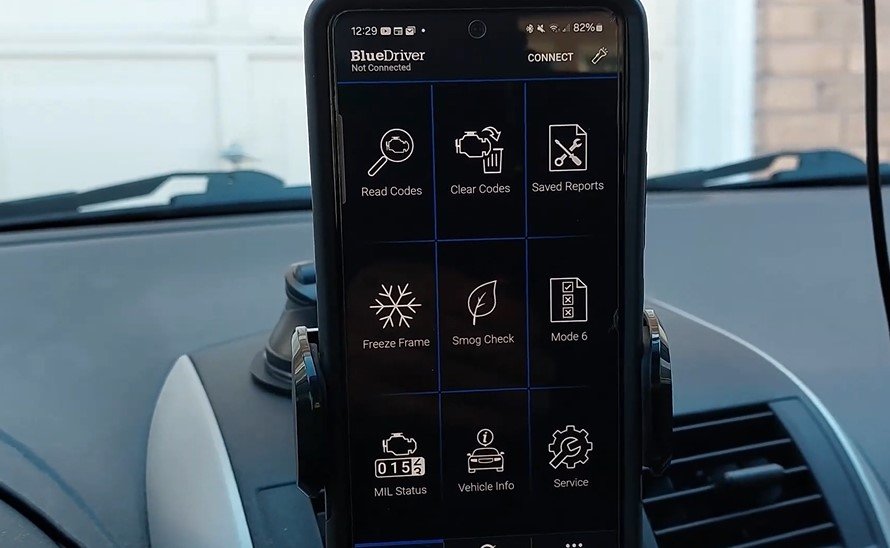
If you’re still wondering what is Mode 6 on a scan tool, understanding its identifiers will make the screen less confusing.
Mode 6 uses identification numbers to organize its test results.
What Are TIDs, CIDs, and MIDs?
- TID (Test ID): Identifies a particular onboard diagnostic test.
- CID (Component ID): Identifies a component or related test item in certain older diagnostic formats.
- MID or OBDMID (Monitor ID): Identifies a monitored system in supported diagnostic formats.
The way these identifiers are organized differs between older OBD2 protocols and CAN-based systems.
For example, a scanner might display TID $01 or MID $21. Those values cannot be interpreted correctly without knowing which diagnostic format and vehicle application they belong to.
Don’t assume a TID or CID from one vehicle means the same thing on another.
How to Interpret Test Values
Most useful Mode 6 records contain:
- A test or monitor identifier.
- The recorded test result.
- A minimum or maximum acceptable limit.
- Units and scaling information.
- A Pass or Fail indication, if the scanner provides one.
Some scanners translate this information automatically. Others show raw numbers that require manufacturer service information.
Also, the largest number isn’t always the worst result. Some tests fail when the measured value is too high, while others fail when it’s too low.
Why Mode 6 Data Isn’t Always Easy to Read
Not every scanner displays Mode 6 information in the same way.
A basic tool may show raw hexadecimal identifiers, while another scanner may translate those numbers into plain-English descriptions.
For example, one tool might display an unfamiliar monitor ID. Another could identify the related emissions test and show its measured result and acceptable limits.
However, even an advanced scanner can display an incorrect or incomplete description if its database doesn’t match the vehicle.
When a result is unclear, check the manufacturer’s service information rather than relying on a generic online decoding chart.
Practical Mode 6 Diagnostic Examples
1. Investigating an Oxygen Sensor Problem
Imagine a Toyota Camry has poor fuel economy and occasional hesitation, but no confirmed trouble code.
You check live data and notice something unusual in the available oxygen sensor readings.
If the vehicle provides an applicable Mode 6 sensor test, you can compare its recorded result with the programmed limits.
An abnormal result may support further testing of the sensor, its wiring, heater circuit, or related engine conditions.
However, replacing the sensor based only on a Mode 6 reading would be premature.
For additional diagnostic steps, see our guide on how to test an O2 sensor with an OBD2 scanner.
2. Checking Catalytic Converter Performance
Mode 6 may provide results from catalytic converter efficiency tests.
This can be helpful when investigating a catalyst-related trouble code or checking whether the monitor completed after a repair.
But a failed catalyst test doesn’t always mean the converter itself is defective.
Exhaust leaks, engine misfires, incorrect fuel control, and sensor problems can affect catalyst monitoring.
3. Investigating an EGR Problem
Suppose a Chevy Malibu has an intermittent rough-running problem and the vehicle supports an EGR-related Mode 6 test.
An abnormal result could indicate that the EGR system deserves further attention.
You would still need to inspect the appropriate passages, valve operation, electrical connections, and related components.
Mode 6 helps identify where to investigate. It doesn’t confirm whether the valve needs cleaning or replacing.
Scan Tools That Support Mode 6
Not all OBD2 scanners display Mode 6 information.
Some basic code readers focus on trouble codes and emissions readiness. Others include onboard monitor test results but may display them as raw data.
| Scanner Type | What to Expect |
|---|---|
| Basic Code Reader | Mode 6 support varies by model |
| Bluetooth OBD2 Adapter | Depends on adapter, app, and vehicle |
| Mid-Range Handheld Scanner | May show monitor results and readable descriptions |
| Professional Diagnostic Tool | May offer additional test descriptions and vehicle-specific information |
Before buying a scanner specifically for Mode 6, check whether it supports:
- Service $06 or On-Board Monitor Test.
- Your vehicle’s make, model, year, and engine.
- Readable test descriptions and limits.
- The diagnostic protocol used by your vehicle.
- Software updates and available manufacturer coverage.
A more expensive scanner doesn’t automatically guarantee better Mode 6 results for every vehicle.
Mode 6 vs. Other OBD2 Diagnostic Modes
To understand what is Mode 6 on a scan tool, it helps to compare it with the other diagnostic modes.
| Mode | Purpose |
|---|---|
| Mode 1 | Current diagnostic data and readiness status |
| Mode 2 | Freeze-frame information |
| Mode 3 | Confirmed emissions-related trouble codes |
| Mode 4 | Clear or reset supported diagnostic information |
| Mode 5 | Oxygen sensor test results on certain older systems |
| Mode 6 | Onboard monitoring test results |
| Mode 7 | Pending trouble codes |
| Mode 9 | Supported vehicle identification information |
Mode 1 shows available current operating data. Mode 3 retrieves confirmed trouble codes, while Mode 7 provides pending codes.
Mode 6 adds the results of supported onboard tests.
Each mode answers a different question, which is why using them together is often more helpful than relying on one screen.
For example, Mode 2 provides a snapshot of certain operating conditions when a fault was recorded. Our guide on how to read OBD2 freeze-frame data explains how to use that information during diagnosis.
How to Use Mode 6 With Other Diagnostic Information
Here’s a practical approach you can follow when investigating a problem.
- Start With Trouble Codes: Check for confirmed and pending DTCs.
- Review Freeze-Frame Data: Look at available operating information recorded around the fault.
- Check Live Data: Observe relevant sensor readings and engine operating conditions.
- Open Mode 6: Locate the onboard test related to the suspected system.
- Verify the Test Information: Check its description, measured value, units, and limits.
- Perform Additional Tests: Inspect wiring, components, and mechanical conditions before replacing parts.
If you find an unfamiliar DTC during the first step, our OBD2 trouble codes list and meanings can help you identify the affected system and possible causes.
For example, if a Subaru Forester shows unusual oxygen sensor behavior, Mode 6 might provide another piece of evidence.
But you should still check for exhaust leaks, wiring problems, fuel-control issues, and other possible causes before replacing the sensor.
Expert Tips for Using Mode 6 Effectively
Read Your Scanner’s Manual
Look for a section called Mode $06, On-Board Monitor Test, or Onboard Monitoring.
The manual may explain how your particular scanner displays test results.
Check Vehicle-Specific Information
Don’t use a generic test definition unless it applies to your vehicle’s year, engine, and diagnostic system.
Don’t Replace Parts After One Failed Test
A failed test indicates an abnormal monitored result, not necessarily a failed component.
Compare it with other diagnostic information and investigate the likely causes.
Save Results for Comparison
If your scanner allows exporting or recording Mode 6 data, save useful results along with the date and driving conditions.
Repeated measurements under comparable conditions may help you recognize meaningful changes, although they don’t guarantee a future failure prediction.
Check Readiness Before Evaluating Repairs
After completing a repair, make sure the relevant monitor has had an opportunity to run again.
An incomplete monitor doesn’t automatically mean the repair failed.
Readiness status also matters during vehicle inspections. Our guide on how to pass an OBDII emissions test explains why incomplete monitors can affect inspection results.
Common Mode 6 Mistakes to Avoid
Mode 6 can be helpful, but several mistakes can lead to incorrect conclusions.
- Assuming a near-limit result means imminent failure: Test results can change with operating conditions.
- Using the wrong test definition: Identifiers may have different meanings across vehicles.
- Confusing stored results with live data: Mode 6 usually reports completed tests.
- Treating a passed test as proof everything is fine: One passing test doesn’t confirm the entire system is healthy.
- Clearing codes too early: This may erase useful information and reset readiness monitors.
The best approach is to treat Mode 6 as supporting evidence, not a final diagnosis.
Why Every DIY Mechanic Should Understand Mode 6
Not every car problem starts with a warning light.
Sometimes you notice a rough idle, occasional hesitation, or a change in fuel economy before the computer stores a confirmed code.
On supported vehicles, Mode 6 may provide additional information that helps explain what the onboard diagnostic system has observed.
It can help you:
- Investigate intermittent symptoms.
- Understand individual emissions monitor results.
- Support diagnosis without unnecessary parts replacement.
- Check whether certain onboard tests have completed after repairs.
That doesn’t make Mode 6 a substitute for proper testing, but it can make your diagnostic process more informed.
If you need to compare stored test results with current engine conditions, learning how to read live data from an OBD2 scanner can help you understand the differences.
Frequently Asked Questions About Mode 6 on a Scan Tool
What is Mode 6 on a scan tool used for?
Mode 6 retrieves results from supported onboard monitoring tests. It can provide useful information about emissions-related systems such as oxygen sensors, catalysts, EVAP, and EGR.
Can Mode 6 detect problems before a trouble code appears?
Sometimes. A completed onboard test may provide useful evidence before a fault meets the criteria for a confirmed trouble code. However, Mode 6 cannot reliably predict when a component will fail.
Is Mode 6 data easy to understand?
Not always. Some scanners translate test results into readable descriptions, while others display raw identifiers and values that require vehicle-specific information.
Do all OBD2 scanners support Mode 6?
No. Scanner features and vehicle coverage vary. Check the manufacturer’s specifications for Service $06 support.
What types of tests does Mode 6 include?
Depending on the vehicle, Mode 6 may include catalyst efficiency, oxygen sensor performance, EVAP, EGR, VVT, or misfire-related test results.
Final Thoughts: Is Mode 6 Worth Learning?
Absolutely. Understanding what is Mode 6 on a scan tool gives you another way to investigate vehicle problems beyond ordinary trouble codes.
It can help you review onboard test results, investigate intermittent symptoms, and check whether certain emissions monitors have completed after repairs.
But don’t expect Mode 6 to tell you exactly which part is bad or how soon something will fail.
Use it alongside trouble codes, live data, freeze-frame information, and proper component testing.
That’s how Mode 6 becomes genuinely useful: not by replacing diagnosis, but by giving you more information to make better repair decisions.